How To Start A Shopify Store In 15 Minutes With 7 Simple Steps!
Our goal at nouvi digital marketing is to help readers get the information they need, we partner with companies to help bring you that information. If a purchase or signup is made through our partners, we receive compensation for the referral. Learn More
The easiest way to sell products online is with Shopify. It's super easy to use and it's all you need to launch an online store.
Shopify’s in-built eCommerce technology gives you access to the company’s backend, web design, and optimization tools for one small fee.
It’s a fantastic platform for beginners because you don’t need to spend time on web development, and you have the opportunity to sell any product you want.
With the growing intensity of the retail apocalypse, thousands of entrepreneurs are flocking towards eCommerce and looking for ways to create digital storefronts.
In this step-by-step guide, I will show you how to set up your own store. I'll show you everything you need to do so you can get your online shop up and running quickly.
By the time you finish reading, you’ll have your own eCommerce store with Shopify, ready to sell products to a global audience.
Quick Start Guide
1: Sign up for Shopify
2: Shopify Admin Panel
3: Choose Your Shopify Theme
4: Add Products to Your Store
4: Setting a Price for Your Products
5: Setting up a Domain for Your Store
7: How to Set Up Shopify Payments
Best Platform: When it comes to eCommerce store platforms I recommend Shopify. It's easy to use and perfect for beginners looking to start an online store. You can even start using it for free. They offer a 14 Day Trial so you can get started today. Claim your 14 Day Trial here and get started.
How to Start Your Own Shopify Store
Creating a Shopify store is super simple and you don't even need any money to get started. Shopify has a 14-day trial to get you started
1: Sign up for Shopify
Go to the Shopify homepage and click on the “Start free trial” button to create an account.

Because the company offers a 14-day free trial, you don’t need to enter your credit card information. All you have to do is provide an email ID, choose a password, and pick a name for your store.
Once you’re done, wait for the company to process your information. In the next step, you have to enter some personal information to move forward.
Essentially, if you want to run the store like a real business, you need to share your contact details and address so that Shopify can configure your payment currency and sales tax.
After you’ve provided all of that information, you’ll be redirected to the admin panel of your Shopify dashboard.
2: Shopify Admin Panel
Here’s what the main area of the Shopify dashboard looks like.
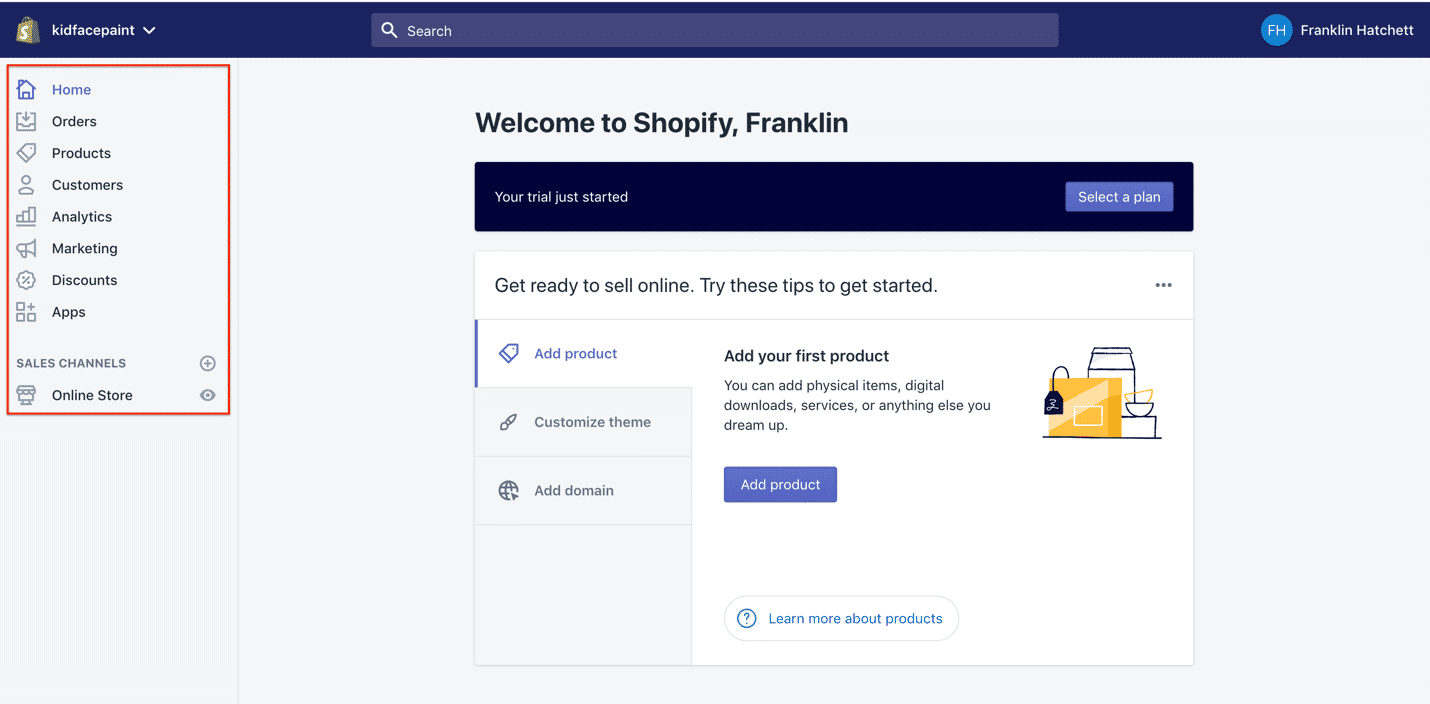
As you can see, there are several clickable tabs on the left. Here’s a quick rundown of what they offer.
Home: This is where you get an overview of what’s happening with your Shopify store.
Order: The place where your first order shows up. The same will be used to track and manage upcoming orders.
Products: Here, you can add and manage your items, create product collections, set up gift cards, and more.
Customers: This area enables you to manage various types of customer details, including their sales volume, personal details, previous orders, and more.
Analytics: Open Shopify analytics when you want to generate reports about your sales performance.
Apps: This is where you can extend the functionality of your store by installing different Shopify apps.
Online-store: The place where you can find all of your store’s settings, including checkout settings, personal info, shipping, taxes, and more.
In addition to these tabs, you can click on the “Settings” tab at the bottom left corner to find more options.
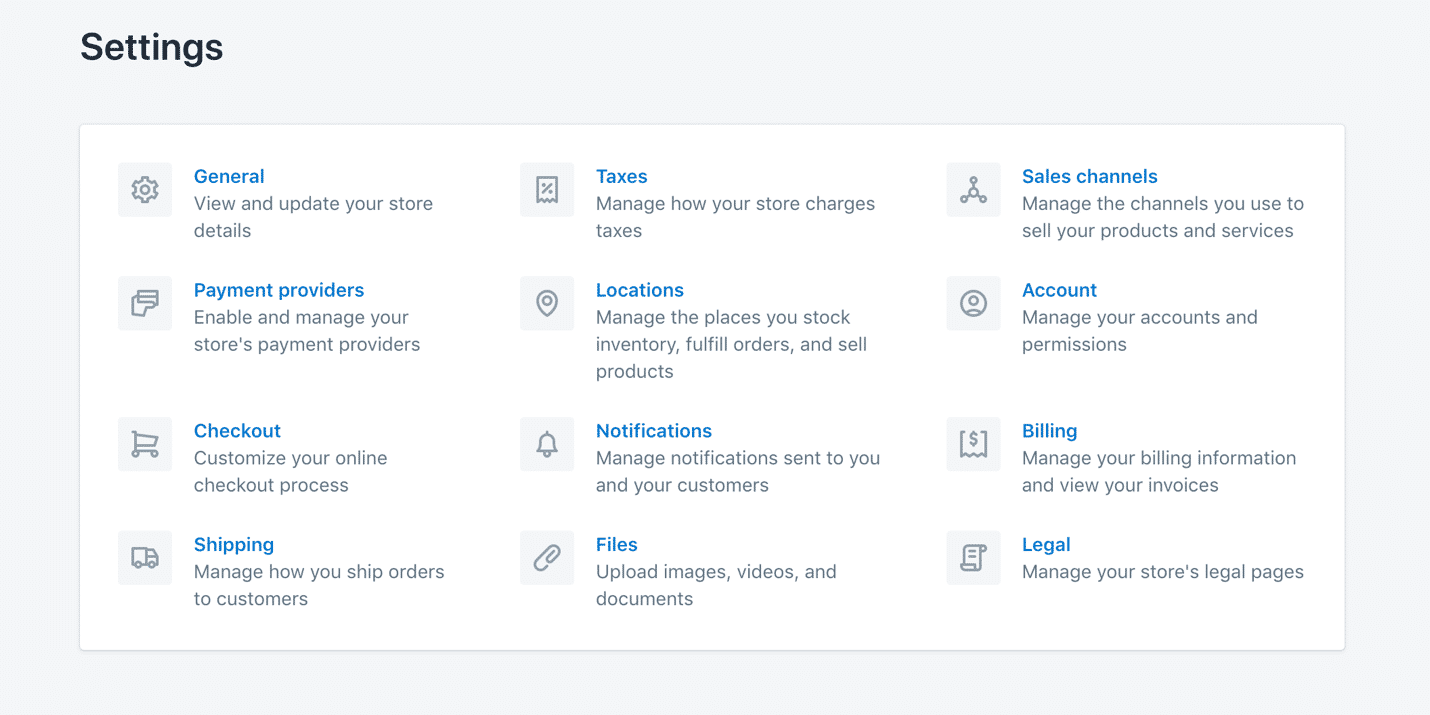
In the “General” option, you can edit the name of your store, your information, the time zone, currency, and more.
The next thing you’d want to check out is “Shipping”. Here, you can adjust your shipping rates and zones. On a paid plan, Shopify will also let you calculate shipping rates using accounts from UPS, FedEx, and more.
You don’t have to worry about the rest of the options before your website is live.
3: Choose Your Shopify Theme
Just as any other website, your Shopify store was built with a default (they call it debut) theme. The debut theme can be customized in two ways:
You can get a new theme to replace the existing one
You can customize the existing debut theme to reflect your business and its goals better
To get started, click on the “Customize Theme” button on your homepage.

Customizing an existing theme usually involves tinkering with the website layout. In plain English, it’s the refinement of existing layouts. Shopify’s drag-and-drop theme editor makes it easy to make quick adjustments.

I recommend keeping it just to that rather than going for major design changes (especially if you don’t know code).
If you don’t like the appearance of a theme, just choose a different one instead of customizing the entire thing.
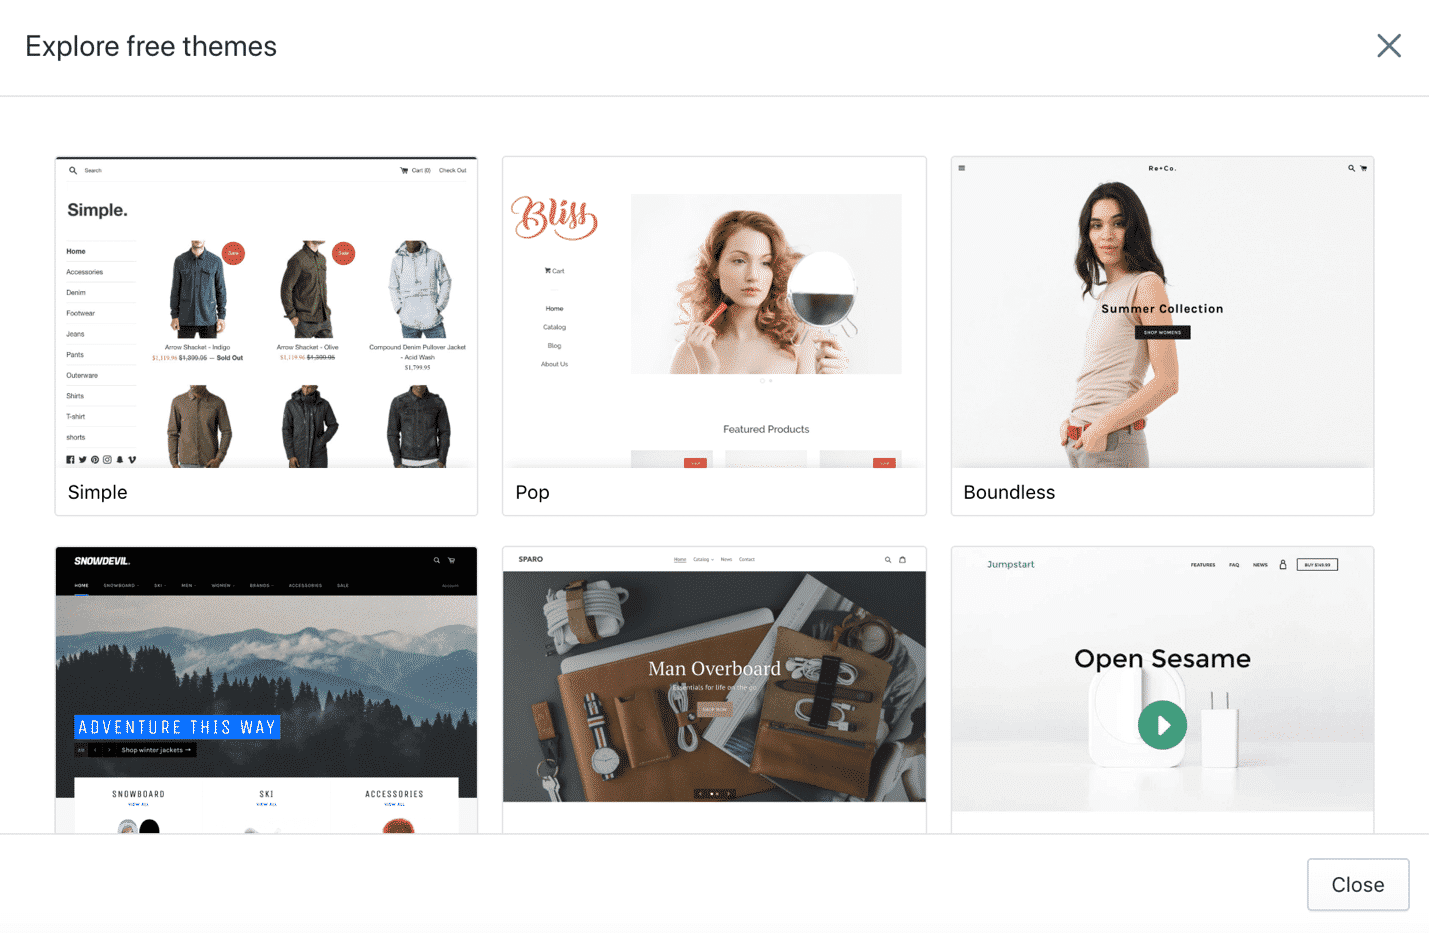
Go back to the homepage, click on “Customize Theme”, and then click on the “explore free themes” button in the Themes area of your dashboard to get an overview of the available themes.
Browse through the themes and select the one you like best. You’ll also get several layouts to pick from for each of these themes.
Once you’ve added a new theme, it should display in the Themes section, right below the default theme.
Your new theme is now added to your store. Activate it by clicking on the “actions” button below the new layout and then click on “publish”.
That’s it. You’ve successfully given a new look to your store.
Next, let’s take a look at how to add a domain to your Shopify website
4: Add Products to Your Store
In the Shopify admin area, you can either click on “add product” in the center of the screen or hit “products” in the left-hand navigation bar to add a product to your store.
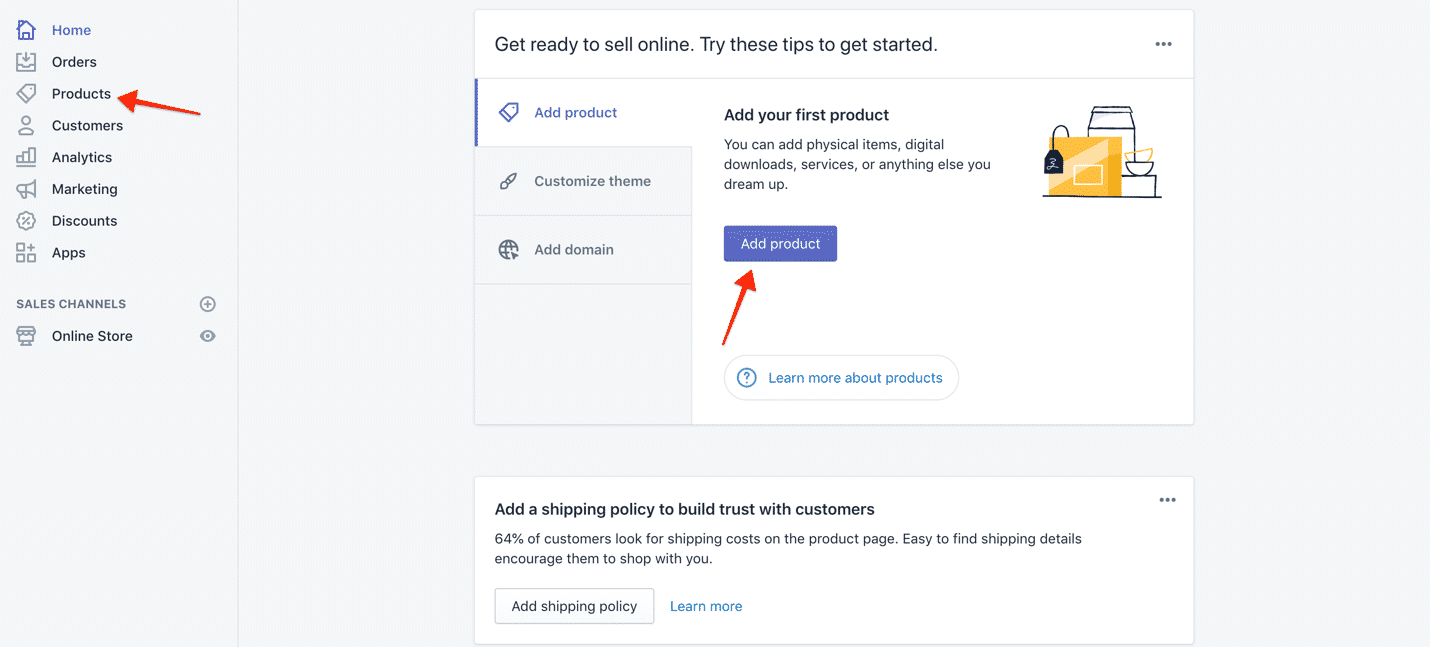
If you don’t want to add products manually, you can upload a .csv file for your product catalog. Follow the structure recommended by Shopify to prevent import-related errors.
In this guide, we'll add products manually. Just click the “add product” button, and you’re ready to create its description.

Enter the name of the item in the title field and the description of the product in the next one. Put some thought into these as they’ll also be picked up by Google.
Then, enter the information about the vendor, product type, and the collection the item belongs to.
Pro tip: Always organize your products into collections. This will make it easier for people to find the product line they’re looking for.
The next step is to add relevant tags and high-quality product images. Each photo will display in the standard size, but hovering the mouse over a particular area will highlight that part (the same thing happens on Amazon and other stores).
Therefore, always use high-resolution imagery when it comes to showcasing your product’s visual appeal.
Feel free to add as many products as you like. Just make sure to save each of them at the end.
4: Setting a Price for Your Products
When it comes to pricing, you’ll get the following three fields to work with:
Price
Compare at price
Cost per item
The second field is important if you want to show your visitors that an item is on sale. The displayed price is the original one before the discount and the price it is available for is in the price field.
If you don’t want to associate the item with a sale, leave the compare at price field blank.
Another option available at your disposal is inventory tracking. This instructs Shopify that you want it to track your inventory.
To activate this, choose “Shopify tracks this product's inventory” and define the number of items available to buy.
This means if you sell 20 t-shirts, Shopify will display the item as “out of stock” and prevent any additional orders until this quantity is updated.

If you have the stock-keeping unit (SKU) available for the product, enter it in the SKU field.
For those who aren’t aware of SKUs, they’re internal identifiers that help you find products faster. I recommend you insert a standardized SKU for every item right from the beginning.
When you’re done, click on “Save product” at the bottom right of the screen. The product should then display in the section for product overview.
Bravo, you’ve just added your first product to your Shopify store. Now let’s make sure the overall design and theme of your website look inviting.
5: Setting up a Domain for Your Store
After you add a product and choose a theme, it’s time to set up a domain to make your store official.
To do so, head back to the main dashboard, and then click on “add domain” to open the Domain section.
Shopify offers the following three options for adding a domain name:
Connect existing domain
Transfer domain
Buy new domain
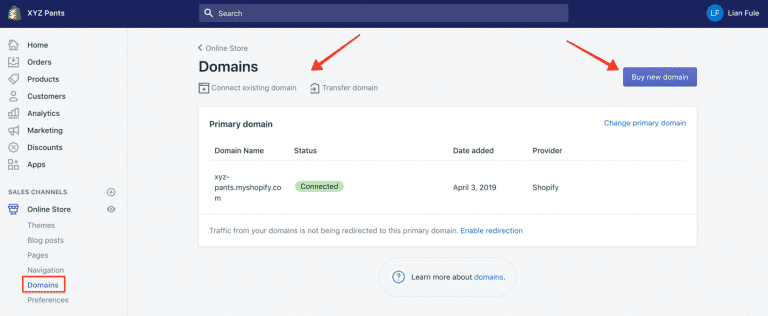
Shopify domain names have the “yourstore.myshopify.com” URL by default. You can convert this into a proper www.yourstore.com domain by buying a new domain from Shopify. It costs $14 a year.
If you’ve already purchased a domain from an external web hosting company (like Bluehost), just connect it to Shopify to use it as your online store’s internet address.
There’s also the option to transfer a domain from an external provider to Shopify. I recommend doing this if you want to pay a single provider at the end of the month.
Congratulations, you've successfully added a domain to your Shopify store.
The last step is to set up payments. Once that’s done, you can make your store live and start selling products to people around the world.
7: How to Set Up Shopify Payments
To receive money in your corporate bank account or activate an alternative payment processor, go to your Shopify store’s Settings. Now choose “Payment providers” to configure what account you want to receive your money in.

While Shopify supports several alternative payment methods, PayPal Express and Shopify Payments are configured by default. Both of these charge their standard fee on sales.
For using PayPal, you’ll need to create a merchant account. This can be done by logging into your personal PayPal account and finding the option to upgrade to a merchant account.
Regardless of the payment method, you end up choosing, Shopify will sync your customer’s payments with their orders, allowing you to track what has been bought, who bought it, and how, without leaving Shopify if you’re using the native payment configuration.
Also, you get access to accelerated checkouts such as Apple Pay. These enable prospective customers to check out seamlessly, enhancing their experience and helping you increase sales.
Awesome! You Just Started a Store
That’s basically it. You’re now ready to introduce your newly created store to the world. The last step is to choose a paid Shopify plan.
While the free trial lets you access most of the platform’s features, you can’t actually sell products until you become a paid subscriber.
So opt for a Shopify plan that suits your budget and needs to get started.
For example, you can start with the $29/month plan if you just want basic store functionality. This is a suitable option for first-time sellers. Advanced features like abandoned cart recovery require you to pay for the $79/month plan.
There’s no need to worry as Shopify allows you to upgrade, which means you can scale the functionality of your website as your business grows.
Done For You Shopify Service
Advantages of Using Shopify
It lets you add a custom domain (e.g. franklinhatchett.com), hosts the website for you, and deals with the complicated backend.
It tracks, processes, and manages all your payments and orders, allowing you to focus on building a brand.
It comes with a huge list of apps that let you integrate product reviews, create loyalty programs, and more.
What About The Downsides of Shopify?
To be fair, Shopify doesn’t let you control the backend (website code, hosting, etc.), so it may feel a bit restrictive if you’ve been building websites from scratch.
The alternative is to create a WordPress website and add the WooCommerce plugin. But, if you’re looking for an easy, simple, hassle-free method, choose Shopify.
To me personally, it’s definitely worth giving Shopify the control of your backend. They’re a big company, and the chances of a Shopify store getting hacked are quite low compared to a WordPress website.
Overall, Shopify offers plenty for aspiring store owners to sink their mouse into.
Whether you want to sell popcorn, designer handbags, or skates, Shopify will be ideal for you.
You Might Also Enjoy Reading more subjects!
Comments
Post a Comment